Showing posts with label origami pinwheel. Show all posts

Thursday, May 31, 2012

So If You Are In Fort Worth during July or August...

And have always wanted to learn how to make this:

Check out Cabbage Rose Quilting where I will be teaching this summer.

It's a two and a half hour class where we will go over how to make the block as well as various ways to do the hand work on the pinwheels itself.

I will have this quilt as well as a couple of other variations to show all the fun you can have with the block, depending on how adventurous you feel. This is a great project for people learning how to quilt as well as those who have been at it for years.

Hope to see you there!

Tuesday, November 15, 2011

Finished 2011: Origami Quilt -- The Florida Edition

I promise I haven't fallen off the face of the planet -- yet.

Work has been crazy. Life -- insane. Not to mention drowning in deadlines.

However, I have been able to finish a quilt here and there.

Here's the first of three quilts I'll be blogging about in the next couple of weeks, as well as one afghan.


Machine Pieced. Hand-quilted in no. 8 perle cotton -- platinum color. Print fabrics are from a line from Moda that I purchased years ago. The Solids are from Kona and I don't remember the names of the colours

There is quite about less quilting done on this quilt than what I consider typical for me. To be frank, I wasn't exactly thrilled with the final results until I saw a photograph of it from last months Fort Worth Modern Quilt Guild meeting. I love the way the quilting gave this quilt a lot more definition in the end without taking away from the 'patchwork' done on the quilt (there is actually no sashing done on any of the blocks; those lines are from the quilting itself).

I need to go re-shoot the photographs of this quilt as I'm still not thrilled about the photos. Hopefully, I can find some time in December as the academic semester comes to a close.

Sunday, September 18, 2011

Sneak Peak: An Origami Double Pinwheel

From September 18, 2011


More information will be forthcoming in the next month :)

Friday, September 2, 2011

Inspiration: Origami Pinwheel

Amy at The Crafty Dame sent me a link with her gorgeous Origami Pinwheel Quilt.

kona pinwheels

There are so many things I love about her quilt:

*The turquoise background

*The amount of space between each pinwheel

*The turquoise background

*And most importantly, the quilting -- The lines are so clean and full of movement; accentuating the patchwork without competing against it.

kona pinwheels angle

Every aspect of her quilt is so beautifully balanced in my opinion. If you have a moment, jump over to her blog for more pictures. Especially to see her beautifully executed label.

Oh and did I mention I love the turquoise background?


Sunday, August 28, 2011

Finished 2011: Origami Quilt

I have great news!

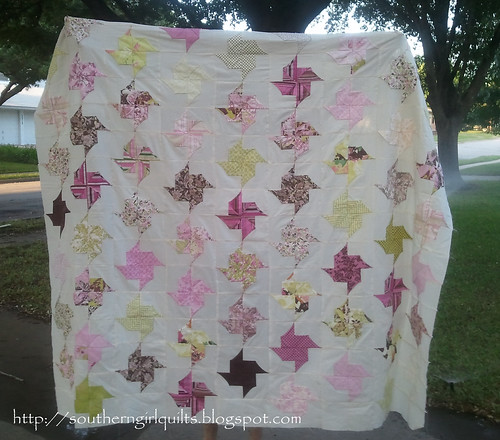
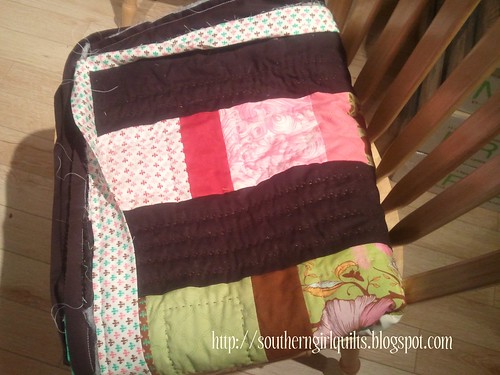
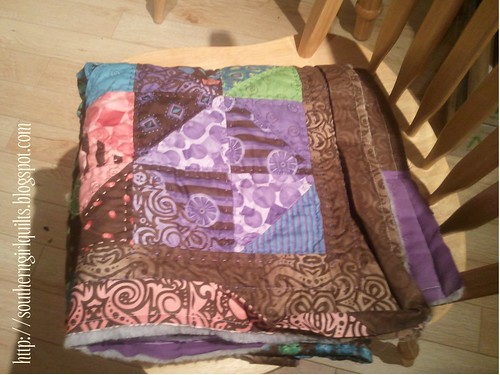
My Origami Quilt is back from my long arm quilter aka my momma.


I gave my momma free-reign when it came to quilting the top. So I had no idea what the finished product would be until she shipped it back to me.

As soon as I got it, I called her to tell her how much I love the work she did.


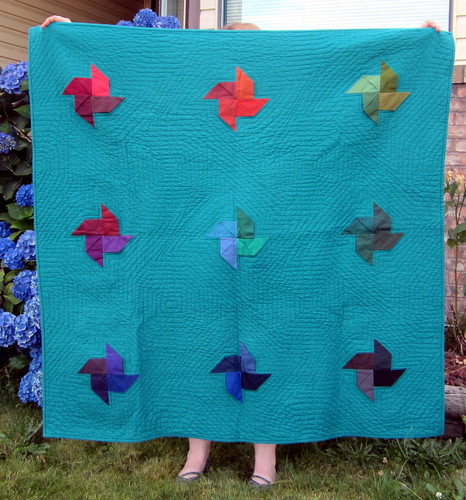
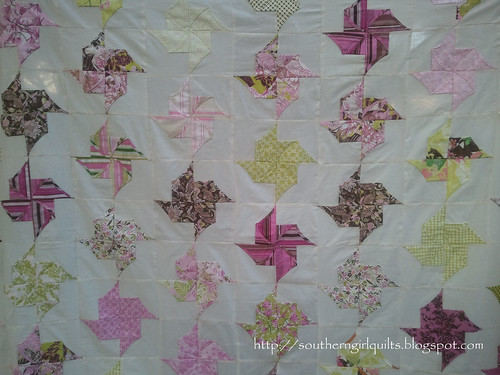
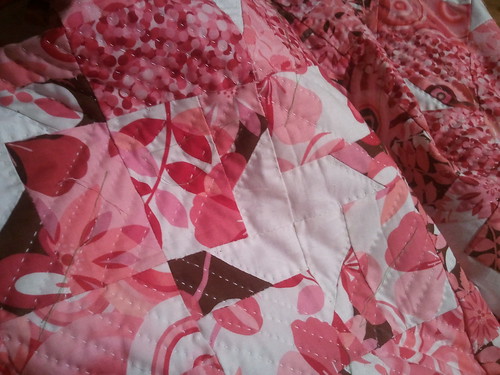
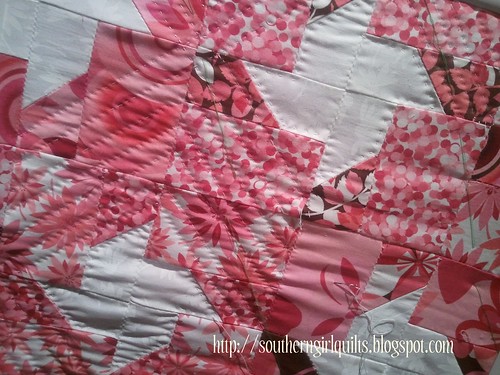
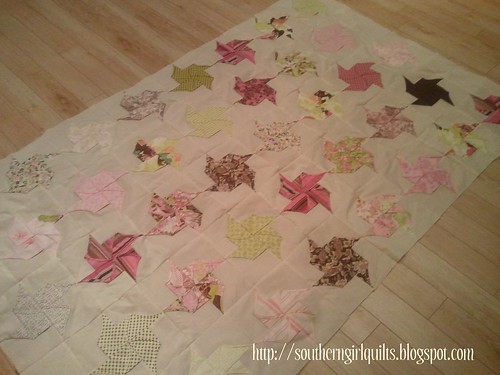
I love the pale pink thread she used.

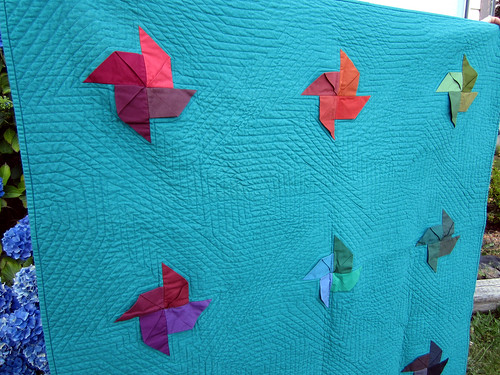
I love the simplicity of the cross-hatching she decided to do.

During our phone conversation -- okay after I finished squee-ing about the finished product -- I asked her why she did what she did. She told me simply, "I did exactly what I knew you would want. Something unexpected (the pale pink thread) and something simple (the cross-hatch); as well as wanting to highlight the pinwheels."

Wow. I mean, she will always be my favourite long-arm quilter but I have a feeling she will be my only long-arm quilter :)

Anyway...

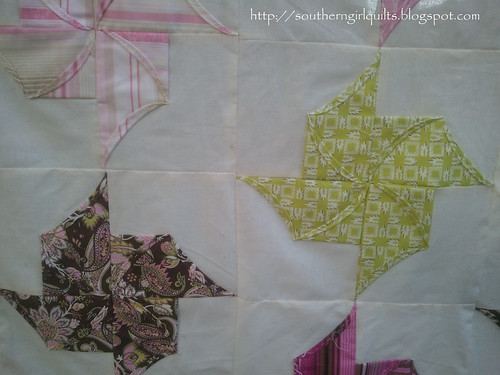
Many of you asked me about quilting this fabric heavy block and here are choices my momma made:

1. The lightest batting she could find; to ensure that the weight of the quilt wasn't oppressive. I have to agree with her on that. The quilt she sent me is surprisingly light weight that even younger children adore it.
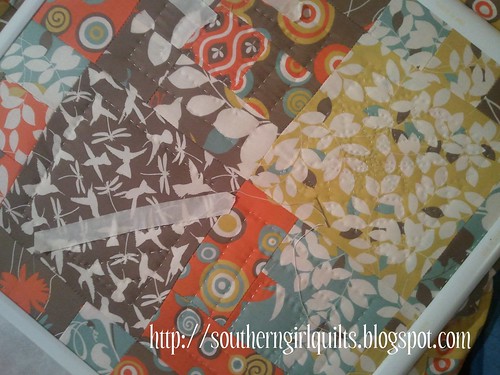
2. She elected 
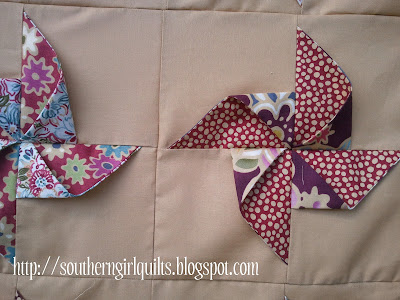
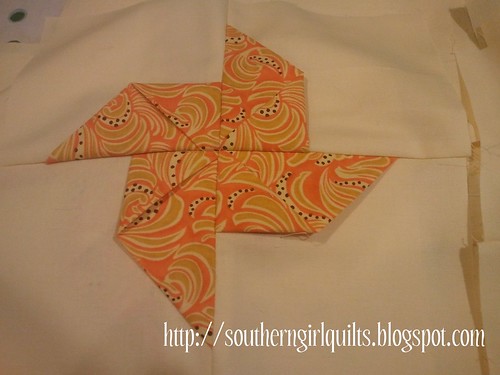
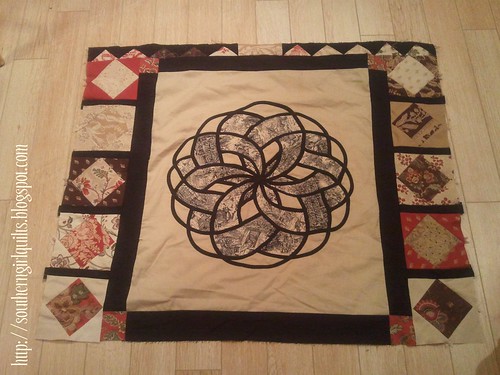
not to quilt the pinwheels after seeing the final product; though she had been thinking that since first seeing the blocks during the construction of this quilt...


Ultimately, her decision was based on how much fabric is actually involved in the quilt at certain corners. At the middle of each pinwheel you are looking at 6-12 layers of fabric and batting and the backing.

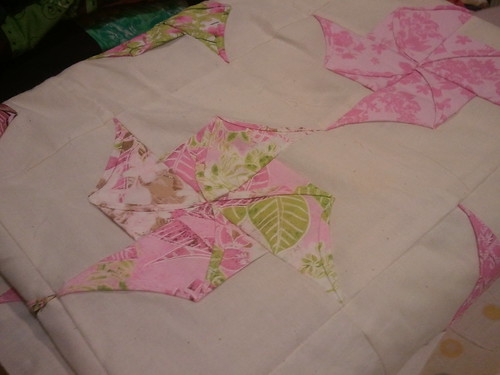
That being said we both think it is possible to quilt the pinwheels but it may take several jeans-rated needles to do so and you would want to stay way from some of the seams.

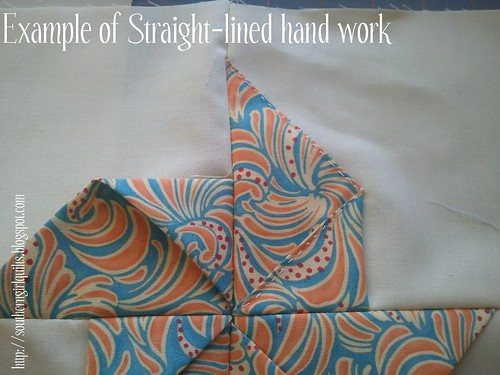
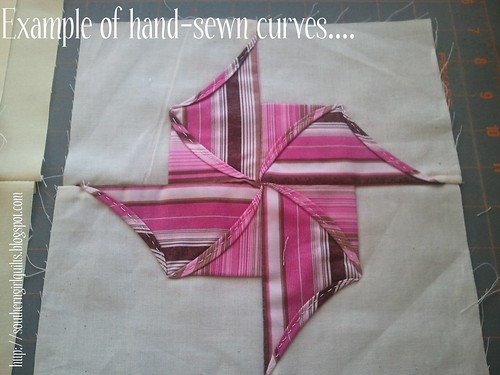
On top of that, she said she didn't want to take away from all the hand-work I did to create the curves.

If you do decided to quilt the pinwheels, please let me know, I would love to hear about your experience with it.

3. If you decided to hand-quilt, I have learned that a large frame is the only way to go. The construction of lap frames can't always take the amount of fabric in the pinwheels. I'm constructing an old fashion frame that I can easily move around since my huge standing frame is occupied at the moment. When I get the Florida Version on the frame, I'll be sure to share pictures of my frame.

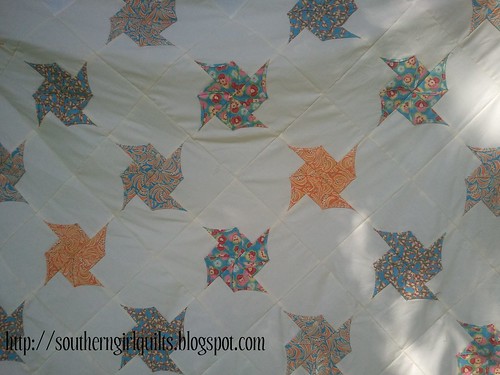
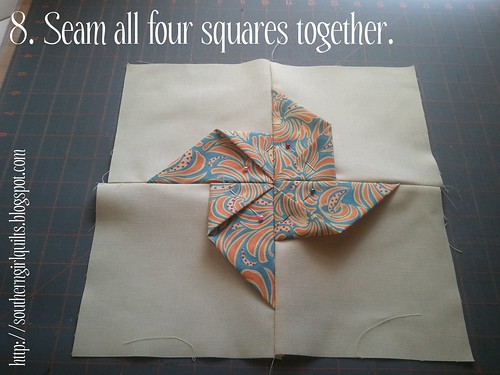
Last but not least, if you are in the DFW area, I will be teaching this block at the September Meeting of Sew Fresh at Cabbage Rose Quilting & Fabrics on Thursday, September 8.

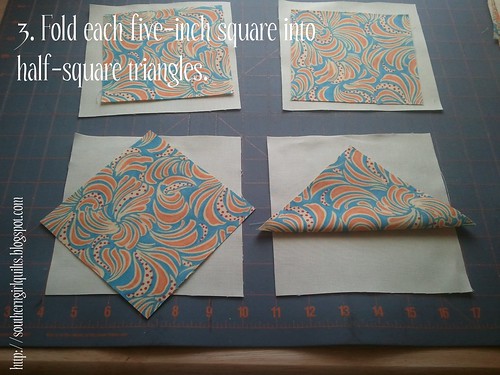
This will be a hands-on tutorial. And though, we won't be able to sew the seams, you will leave with the confidence to get through the hard part of the block which is the folding! As well as see the quilt above,
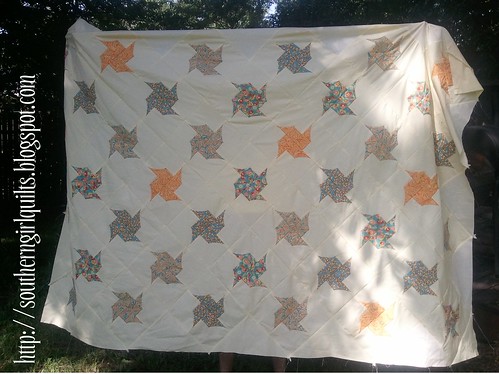
 the Florida Quilt, the Polly Goes to Paris Quilt and one or two more quilt tops featuring this block.

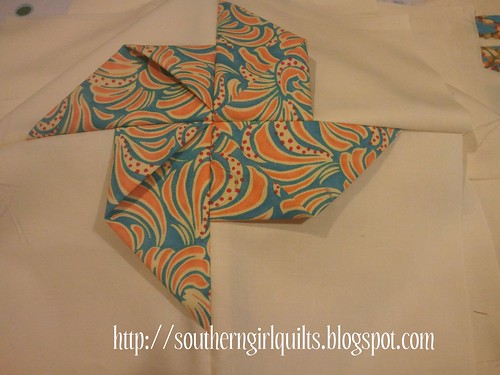
The live-tutorial will feature how to make the Florida Quilt version. To do this you will need the following materials:

*straight pins
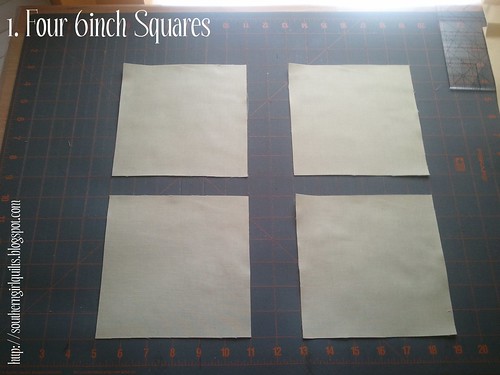
*at least 4-6" squares (this will be your back ground fabric)
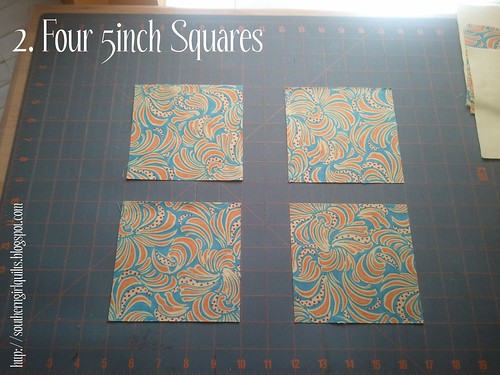
*at least 4-5" squares (this will be your pinwheel fabric) -- Prior to arriving, please iron these squares using starch. It will make the folds easier but it is not a requirement :)

And that's it.

For everyone else, the hubby has promised to help me make videos of this tutorial in English and Spanish and possibly French. MGO and I have both started back with school but I'm hoping we can get these up by November.

I am also working on writing up patterns for the various quilts I make with this block for everyone's enjoyment. So please check back!


Saturday, July 2, 2011

Origami Pinwheels: The Florida Version

Origami Pinwheel: The Florida Version

I finally got these squares (originally from the this tutorial) put together. This time for something a little different, I set them on the point. As a friendly warning, I found it took me almost 4 yards of background fabric to make it work; which led to an unfortunate colour matching problem: the Kona Maize has a fairly noticable variation in the tone. This was something I had never encountered before with Kona Cottons. In fact, their consistency in their dye lots is why I favour them over other solids because I'm notorious for only buying solids in 2 yard increments and I often need additional fabric by the time I finish the project.

Oh well.

Anyway...

I know everyone would rather see a couple more pretty up-close photos.

Origami Pinwheel: The Florida Version

Origami Pinwheel: The Florida Version

And a bit of good news:

This pinwheel quilt

Origami Pinwheel Quilt Top - Full

has been sent off to my long arm quilter aka my mum. I hope to have some pictures by August as well as any words of advice she imparts regarding quilting the pinwheels themselves.

Tuesday, May 24, 2011

WIP Wednesday: May 24

(If you are looking for my giveaway, click here)

Otherwise it's Wednesday, so I'm linking up with Lee and

WIP Wednesday at Freshly Pieced

Between the rain, hail, air-raid-sirens, and other assorted drama that happens during tornado season (and some bad news not associated with it) yesterday, I was able to spend a lot of time sewing --at least between my feeble attempts to get my puppy to relieve herself. The same puppy who will jump into a body of water on command but will not under any circumstances relieve herself in any amount of rain.

And though I have done a lot of work on my quilting project in the last few days...

Rings and Squares

It just sat in the chair yesterday while I finished piecing these "Puss in the Corner" blocks...

Puss in the Corner Quilt

made from French General's La Petite Ecole line which is a baby gift for some friends of ours. I'm hoping to get it laid out tomorrow and a finished quilt top by the end of the holiday weekend here in the States.

I also got some work done on this new Origami Pinwheel Quilt. I started it in order to do the tutorial, but set the project aside for many reasons but mainly because I may have misplaced it :).

To make a long story short, I found it today. And got pinwheels done in the following fabrics...

Origami Pinwheel Quilt -- #2

and

Origami Pinwheel Quilt -- #2

and haven plans to make pinwheels in the following fabrics...

Origami Pinwheel Quilt -- #2

and

Origami Pinwheel Quilt -- #2

All of the fabrics including the background fabric (Kona in Maize) come from my stash. I think we (and I really mean my mother) will try to machine this quilt too (because she loves me and doesn't hate machine quilting as much as I do), so we can see how this quilt top may look if we quilt the pinwheels as well. So by August, I may have THREE examples of this quilt to show you :)

Friday, May 13, 2011

Origami Pinwheel Quilt Top & Giveaway

And for the picture you all have been waiting for....

Origami Pinwheel Quilt Top - Full

Origami Pinwhell Quilt Top - Close Up

Okay, so it's picture(s) :)

I don't have the exact measurements of the quilt but I think it is somewhere between a double and queen-size quilt top; with each 'square' measuring about 9in x 9in.

Origami Pinwheel Quilt Top -- Detail

I have also made plans to make another one of these in the next month with a different line of fabric. The reason being is that I have been asked about machine quilting this pattern and I realised I don't have an answer or even what I would consider a valid suggestion due to the thickness of the fabric in the pinwheels.

So the plan for the month of July is that I will hand-quilt/do-my-own-thing on one version of this quilt, and my momma will machine quilt the other. That way I can let you know how the quilting process worked both ways.

Lastly (and possibly more importantly), it is giveaway time!

Several of you asked me what line of fabric I used and to be honest, I couldn't remember because I probably started on the blocks at least a year if not two years ago. I hated not being able to answer your questions so I did some research and I found the line!

The pinwheel fabric is from Basic Grey's Sultry line (the background fabric is muslin). Now Basic Grey doesn't know I'm doing this but...

I'm giving away four charm packs from this line so you can make an Origami Pinwheel Quilt too from this beautiful collections of pinks, greens, and browns.

Give Away

All you have to do to enter is leave a comment below. I will close entries on Monday (May 16, 2011) by 9am and will post the winner that afternoon. And if you blog about this giveaway, post the link to your blog or your tweet in the comments for an extra entry.

This giveaway is open to every in the States and Internationally.

Hope all of you have a great weekend!

Tuesday, May 3, 2011

WIP Wednesday: May 3

I can't believe how much I have finished in the last week!

The dress that MGO started? Finished!

The two quilts that needed the binding finished? Done!
Update: Hand-pieced Broken Dishes Quilt

Teaser -- Two Finished Quilts

Now I just need a pretty day to shoot proper photos so I can show you these two beautiful babies.

The origami pinwheel quilt top that I had been screwing around with? Done.

Teaser -- Texas Origami Pinwheel

Again, I'm waiting on a pretty day to shoot photos. For some reason, winter made a brief appearance here starting on Sunday -- cold and wet. I'm not suppose to wake up to the outside temperature being 36 degrees Fahrenheit (as it was on Tuesday)...in May...in North Texas.

The Anglophile in me was just hoping that I had somehow broken the space-time-continuum and wound up in London, but alas that was not the case. :)

Anyway...

After all that, the only project I have focused on is my "Pink Texas Stars" quilt that I'm in the process of hand-quilting with no. 12 perle cotton. I've gotten a lot done and depending on the rest of the week and if I have to proctor any exams, I may get this baby finished sooner than later.

Pink Texas Stars

And MGO started working on a new dress for me...

MGO's 2nd Dress

Isn't he doing a great job for only his second time sewing? Especially since I had to take over the last dress because it required some advanced skills in pattern drafting.

He is having so much fun with this new skill set he is learning. I just think it's funny that he got me brewing beer and I got him sewing.

Speaking of brewing, here is my current WIP in that arena:

Porter in Secondary

It's Austin Homebrew's Anniversary Porter currently in secondary. We should be kegging it this weekend when the husband brews again.

Tuesday, April 26, 2011

WIP Wednesday -- April Edition

It has been a long, strange trip since the last time I posted my WIPs at Freshly Pieced. As such, I have been all-over-the-place with my projects. The semester is quickly coming to a close, so I'm hoping that I'll get some projects finished. Without further adieu, here is the short list of all the projects I have going on:

Something Not A Quilt aka The Dress MGO started

After re-drafting three pieces completely today, here is the latest mock-up of the dress (for the initial version that MGO did all by himself, click here)

Redrafted Dress

It looks good-enough for me to cut out the 'real' dress tomorrow. Now I just have to make up my mind regarding the fabric :)

Quilts that Need the Binding Finished

Sadly, I have /two/ at this stage.

My 'Stripes' Quilt which I really need to get done, since it is a house-warming present that is um *cough, cough* two months overdue.

Stripes

And my hand-pieced 'Broken Dishes' Quilt which my husband loves.

Broken Dishes

I can't wait to show everyone this finished project. I splurged on the no. 5 perle cotton I used and it just made all the colours pop more.

The Quilt I'm Quilting

I know the last time I posted, I said that this was the fourth project on my to-do list, but I still haven't decided how to quilt what was number 3, so I skipped to this one.

Pink Texas Pinwheels

Hooking Project

Yes, I'm still working on this:

Hexagon Granny Square

Because it is still not long enough for a twin-size bed.

Random Projects:

Or simply projects to distract me when I misplace the tools I need to complete other projects.

Like today, when I misplaced scotch tape /and/ tissue paper since you can't really draft patterns without either.

Medallion Quilt

Or like Sunday, when MGO started working on the dress and my sewing table was cluttered.

Or like any other time, when I want to work and not think.

Texas Pinwheels

Hopefully, I'll have some finished projects to blog about in the near future; especially since the dress has to be done by Saturday :)

Sunday, February 13, 2011

Tutorial: Origami Pinwheels

This tutorial is for one origami pinwheel.

1. 4 - Six-Inch Squares
This should be your background fabric.

Step One

2. 4 - Five-Inch Squares
This is your pinwheel fabric

Step 2

3. Fold the five-inch square across the diagonal. You will form a half-square triangle
I have an aversion to pressing so I choose not to press with this fold; however, that being said, the first time you make the block yourself it does help.

Step Three

4. Fold each half-square triangle as pictured below
With this fold, it will make your life easier if you press this fold into place.

Step Four

Detail

Step Four: Detail

5. Pin the last fold you made in place
You must pin; even if you are like me and hate to pin.

Step Five

6. Repeat Step 3-5 until you have five 'matching' squares.
Note: The champagne isn't required; except when you try to work with my art director underfoot and terribly unhelpful.

Step Six

7. Form the pinwheel layout.

Step Seven

8. Seam together all four squares.
There is a lot of fabric when you seam the four squares together. I typically press open the first set of seams and press to the side on the second set of seams. The pins stay in during this step.

Step Eight

9. Remove the pins
Step Nine

10. The fun part
You will -at the very least- tack down the corners of each pinwheel.

Step Ten

Detail of Step 10
Step 10: Detail

Or you can hand-sew the edges down (straight line)...
Example of straight hand work

Or you can hand-sew curves --like I did in this project....
Finished product with curve seams

Fresh Poppy Design